The grossness of the attic insulating needs to be balanced with some smaller, simpler tasks that move me closer to my goal of getting this space done this spring.
Here are the doorknobs that have been spray painted (I think) a weird silver finish.
And I will be tackling these windows. They need to be reglazed. The glazing is in very rough shape.
The window latches were painted some weird glitter/gold color. Spraypaint, again I think. See the chunks of glazing ready to fall off?
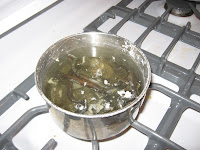
The sash lifts (is that what they are called?) only have a bit of paint around the edges. They have a nice patina. Are they bronze? brass?
Into the cooking pot they went....
...But this method did nothing to loosen the glitter paint. Anybody have a method to remove what I think is spray paint?
Sunday, March 29, 2009
Saturday, March 28, 2009
Another Great Mess
Well, this is what the upstairs looks like today. I cleared everything out of the west attic and pulled the rest of the rock wool insulation out. That was the last section that needed to be done. I used every last trash bag, empty dog food and mulch bags that I had in the house and there is still more insulation and trash to be bagged up.
There is no insulation on this side of the attic now. And the temperatures have dropped near or below freezing again. In truth, I don't feel it much because the old insulation wasn't insulating very well.
And in other news...
This was the weedy, lumpy section of my lawn last summer.
Last night after work, I covered it with landscape fabric in hopes of smothering all that is there in order to prepare the area for some new garden beds.
It was a cold, gray day today. I am glad to have all that insulation pulled out. It was the worst job ever. I still need to figure out how I am going to insulate the attic above the ceiling. There is no access as far as I can tell. I may have to cut a hole in the ceiling. I really don't want to do that. I also do not want to crawl up there. I may hire that job out.
Sunday, March 15, 2009
Stripping Paint while the Sun Shines
It was in the 50's today, Woohoo!! It has been one long, cold winter. Instead of more work in the attic and sewing studio, I decided to take it outside and do some paint stripping. (OK, I realized using the Silent Paint Remover on a wooden table covered with cardboard wasn't the best idea). The doors here are from this...
... that I picked up from the ReStore about three years ago when it looked like this...
... and now it looks like this...
I found a piece of Corian at the ReStore that with a little work, fit on top. I have not yet figured out what finish to put on it. My plan is to strip the kitchen cabinets as well and match this piece to the other cabinets, whether painted or stained.
Bowling...
This past week, I pulled up the rest of the carpeting in the room upstairs. The padding was dust but came up easily and there were not too many staples to pull. Looks like a bowling lane, it is one long, narrow room. My house documents say it is 37 feet long... ooh, I just looked and I am not even close, a bowling alley is 62 feet long... yikes.
Well, after I cleaned up the floor, I put the rug back down in anticipation of painting. I like this color and probably will not change it, just freshen it up.
I hung the new ceiling fan when I ran new wiring up here. I am not a big "fan" of ceiling fans but this room always has temperature extremes and I thought the fan would help with air exchange.
Saturday was one of the first warm days, it was glorious. I opened the windows for the first time in months. My upstairs windows had these weird awning things.
A closeup look shows it is nothing but a piece of siding nailed on to some wooden supports. I do not like how it blocks the light. A couple whacks with a hammer....
Gone...
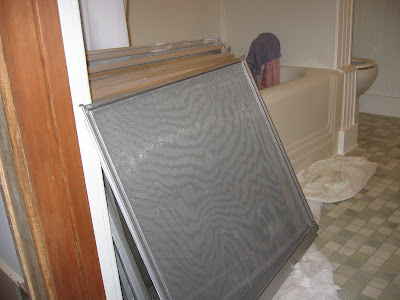
Though I hate them, it was time to wash the aluminum screens and storm windows. I'm going to take these screens in to have some tighter weave screening put in. Many nights I am up late sewing and little bugs seem to make their way through the screens in toward the light.
De-Insulating
This is the worst job ever but I am 3/4ths of the way through. I am taking the old rock wool insulation out of my attic. There is never a good time to do this but it makes no sense to pull out the insulation in the wintertime and in the summertime it is unbearably hot up there. Hello, springtime!
The attic space is full of paper-backed insulation and cardboard covering the walls. It has got to go. I spoke with a contractor friend and he gave me some advice on insulating. The other option could have been spray foam insulation but... again, I've got more time than money. This link describes the process-
http://www.soundhome.com/qa/insulation-energy/insulating-2x4-rafters
Summarized it here:
Q: We are in the process of refinishing the upstairs of our 1920's Cape Cod style home. The rafters are 2x4s with no insulation of any type. There are no soffit vents either. I am considering using foam insulation boards between each rafter (leaving an 1 1/2" air gap) adding soffit vents and a ridge vent. Does this sound like a wise plan?
A: I think that you are on the right track. I would use 2" of polyisocyanurate foam board between the rafter and the 1" or more attached to the bottom of the rafters... The 1 1/2" continuous air gap is important. You should have soffit vents at the bottom and a continuous ridge vent at the top...
I already have the soffits in place but there was no airspace.
This is the view looking up, into the attic space above the ceiling. The absolute worst part of this job is removing this clump of loose insulation to allow the airflow. I use a stick to poke it loose and then get out of the way. Rinse and Repeat...
Here you can see someone cut through the rafter to allow passage of the vent stack. Wonder what is holding up the roof here?
I just did half of this side the attic yesterday. It was a huge, black, itchy, nasty mess.
It looks like the roof leaked at one time, those wet looking spots are dry. Here are the stacks of the old rock wool insulation.
And then it was all bagged up and ready to go out to the trash.
Sunday, March 8, 2009
Bathroom Progress
The bathroom continues to come together, little by little. I boiled the hinges for the medicine cabinet to remove the paint and the black stripe on the hinges came off to reveal a red stripe underneath. Hmm... I have seen this style hinge with either black or red stripes. I boiled the strike plate and door stop as well.
I used a template to cut the vinyl for the floor and it was a perfect fit. I glued the vinyl down and rolled it out with a rolling pin. I used exactly one quart of the glue to cover the floor. I used a 1/16 trowel to apply the glue. It smelled quite toxic. J said it smelled good- "like a new car".
I bought new wood for the baseboards as I was unable to find anything at the Habitat Restore. I took the wood to my neighbor and he ripped the boards to a height of 5 inches. I sanded and primed both sides, then when they were dry, installed them. I was happy to have my compound miter saw. The angles are not perfect but there is always caulk. There are some weird corners around the tub.
Then I installed the toilet. Instead of a standard size shoe molding I tried a 1/4 inch quarter round. (Does that make sense?) It seems the smaller scale works for this smaller bathroom
I almost bought a little cabinet to hang in the toilet alcove. It was a little press board and laminate thing on sale for $15. It had two shelves and two doors. It would fit, but when I came home and looked at the space I thought it might be too crowded in there. I am worried about having enough storage in this small bathroom. The cabinet would probably look tacky. I also remembered that I have an old "Sanitizer" cabinet that I can hang there. I hope to fill it with some of the vintage medical stuff I have.
The shower curtain rod is reinstalled. I love this thing. I also hung a robe hook (Another ReStore find)
The sink will be installed soon. I put the cover on the heating vent.
Here is how I solved this weird area where the tub juts out further than the toilet alcove wall. I wonder how this looked originally. It was all tiled when I bought the house. Not original tile though. I used a piece of the "Swanstone" -the material on the walls of the shower. It looks like a little roof.
Workshop
My basement workshop needed attention so I spent Saturday morning cleaning it up. It was getting hard to find things.
Finally, a clean surface.
This workshop is in the corner of my basement. Two walls are stone and cement block and the other two walls are made out of a collection of doors. Who knows where the doors came from, I believe I have all the original doors in the house.
The pink cabinet came with the house. The brown cabinet I found on the street. It is on wheels so I can pull it out when I use my miter saw. It is a nice space for the grinder ($5 at a estate sale). I never knew how much I needed a grinder until I bought this one. It is so nice to be able to sharpen tools when needed.
Today, I tore up more carpeting in the room upstairs. I am trying to save the tack strips for reuse. Does anyone else get freaked out knowing this sharp row of nails is surrounding the perimeter of every carpeted room?!? Seriously, someone could step on them...
Monday, March 2, 2009
I Just Can't Stop Tearing Things Apart
I had a nice sewing studio. I used to spend a lot of time up here sewing baby slings to sell to fund my house rehab projects.
I like the space. It is the upper level of my house. It is the "+" in my "2+ bedroom" house. The space is one large room. One side is my sewing studio and the other side is a guest area with two beds for sleeping. There are two doors that lead to huge walk attic/storage spaces.
I have everything I need here for sewing and quilting.
But with the attic insulation project, everything got packed away or moved downstairs. Luckily the boy is away at college, so there was room.
Due to the process of rewiring the whole house, every room has been torn apart a little, including this one. The attic area provided access to a lot of the wiring that needed to be done. This space suffered. Once I am done insulating, this space needs to be put back together and cleaned up. This winter I added new outlets and ran new wiring to the ceiling fixtures. This week I worked on patching the plaster in preparation for painting. I decided to tear up the carpet.
I wanted to leave the old carpet down until I painted but I worried that the mess of tearing up the carpet would get the walls all dirty again. So I did a partial tear up. Under the carpet there are wood floors of unknown origin. The padding is dry and brittle. I removed all of that. I also removed the tack strips at the edges of the room and the shoe molding. Typically this is removed when carpeting is put down. I may reuse this downstairs.
So in the middle of the room, there was this strange bulging up of the floor boards. There was patching compound in the cracks (up to 1/4 inch wide). So of course I had to pull up the boards to investigate.
This is the center of the house and the joists come together to rest on a center beam. The joists are not uniform and there is a high point in this area. Or worse case scenario, the front and back of the house are sinking and this is the folding point of the whole thing. I can see where some of the board were chiseled off, but not all. This floor is uneven all over the place and I think this room was done later in the history of the house. The walls are plaster over sheetrock. Downstairs walls are lathe and plaster.
It would be quite a job to strip and sand this floor. The pictures may not show it well, but this floor is totally painted. The edge is a different color brown. It is uneven and not installed with much care. There is no subfloor!! My plan is to keep it as is. I have some carpet from the Restore that I am going to put down.
I pulled all the staples and nails, pulled up the shoe molding and vacuumed the floor. Then I put the carpet back down in anticipation of painting. This is just one half of the room, I still need to do the same on the other half.
(Those boxes on the wall are actually four separate drawer units designed to hang on the wall like cabinets. The are 1950's Conant Ball-Russell Wright blond maple. I bought them at an auction many years ago. They were $5 each and I like how they can be configured in different arrangements, but they will be removed and have to find a new home.)
Subscribe to:
Posts (Atom)